[This article was first published in April 2019 and has been updated and revised.]
Everyone likes to spend time in their backyard, especially in late summer and early fall. And here are simple things you can do to improve your backyard.
In many parts of the country, late summer or early fall are a great time to take on outdoor DIY projects. And the beauty of these ideas are that they are low-cost and easy to do.

An Oasis for Entertaining and Fun - Your Backyard!
Being able to use a backyard for play, for entertaining and for simply relaxing is as traditional as having a fabulously green, lush and healthy lawn in the front yard.
But the truth is that far too many homes have backyards that have slowly devolved into places where junk accumulates, the kids destroy things, and lawn and landscaping has gone to seed.
And for these homeowners, the thought of having someone over and going into the backyard is almost frightening. But there is hope! You really can have a better backyard.
It doesn't have to be a major project to transform your backyard from a suburban debris field into a domestic oasis. It just takes a bit of willingness, work, and inspiration. If you can provide the first two you may find the last one here in this post.

Transforming Your Backyard. Simply.
While there may those yards that are so far gone, so badly deteriorated and dilapidated that nothing less than a professional "makeover" will help, that's not the case for most homeowners.
In fact, for the vast majority of backyards, all that is needed is some simple yard additions and improvements.
On the other hand, if budget is not an issue and you have the time and skills, there are a number of ways you can pull of a truly transformational makeover of your backyard,
But, for our purposes here in this post, we are going to focus on three relatively simply ideas for taking your backyard from an "eyesore" to a "sight for sore eyes".
[1] Add a New Patio
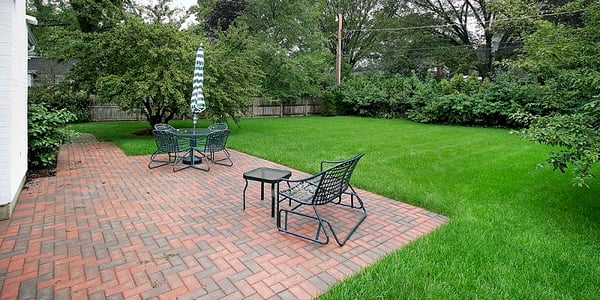
A patio can mean a lot of different things to different people. A patio in one yard may look very different from the one in their neighbor's yard. So, when it comes to patio type and construction, your budget and your personal preferences will drive the final outcome.
In addition, you need to consider what you want to use your patio for? If you want to have friends or family over to entertain "out back", odds are you'll need something larger than five foot square pad of concrete. If not, you may prefer something smaller.
The materials you can use are also subject to both your budget limits and your taste. Common building materials for patios are all over the place! According to Bob Vila,
"Popular patio building materials run the gamut from poured concrete and pavers of recycled plastic to natural flagstone and bricks of fired clay."
Probably the easiest is brick or pavers laid onto a graded patch of yard. The choices of masonry available is almost overwhelming, but these materials offer durability, natural beauty and easy upkeep. And almost anyone can build one with the multitude of resources available to the DIY homeowner.
The idea of a beautiful and functional patio appeal to you?
A patio is a versatile and practical addition to any backyard. It provides a dedicated space for outdoor dining, entertaining guests, or simply unwinding in the fresh air. While building a patio can seem like a daunting task, with careful planning and some DIY spirit, you can create a beautiful and functional patio on a budget.
Materials You'll Need:
- Concrete pavers or patio stones
- Sand
- Gravel
- Edging material (optional)
- Level
- Tamper
- Wheelbarrow
- Shovel
- Rubber mallet
Steps:
- Plan and Design: Start by measuring the area where you want your patio and sketch out a design. Consider the shape, size, and location.
- Prepare the Ground: Remove any grass or vegetation from the area and dig down about 4-6 inches to create a level base.
- Lay Gravel: Add a layer of gravel and tamp it down to create a stable foundation.
- Add Sand: Spread a layer of sand over the gravel and use a level to ensure it's even.
- Lay Pavers: Begin laying your concrete pavers or patio stones according to your design. Leave a small gap (about 1/8 inch) between each one.
- Secure Edging (Optional): Install edging material to keep the pavers in place.
- Fill Gaps: Sweep sand into the gaps between the pavers and mist with water to set it.
- Enjoy: Once everything is set and secure, you can start using your new patio.
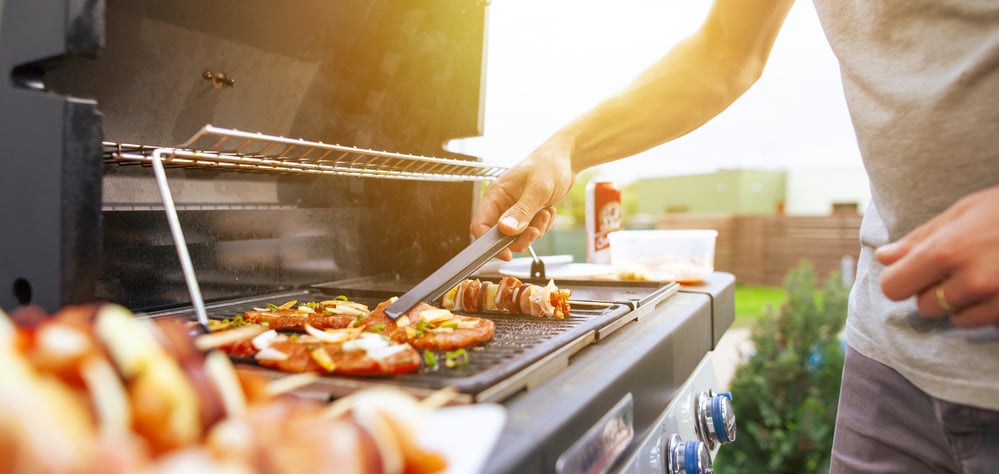
[2] Create a Barbecue Station
 (Image courtesy of Great Oaks Landscaping)
This can be seen as either an outdoor kitchen that's been "downsized" or a barbecue that's been "upgraded." Either way, it's a fun and simple way to add a bit of panache to your otherwise pretty basic barbecue setup.
One way to do this is to dedicate one side, or corner, of your new patio for the barbecue station. This is where you can add an upright, stone enclosure for your barbecue to give it that "built-in" look along with a small counter area next to it for a work station. Depending on how elaborate you want to be, one or two pieces of masonry pool coming can be used for a substantial counter top.
Another idea for this is to add a layer of stone, or brick, on the patio where the barbecue station will be. this allows the whole station to be slightly elevated and stand out visually. In addition, it helps to separate that are from the rest of the patio.
One last thing that could be added is a gazebo-style covering just over the station area. In addition to providing some shade for the hard-working chef assigned with grilling duties, a string of large, outdoor lights can be installed in the top of the covering for a festive and functional touch.
A backyard barbecue station is a fantastic addition for outdoor enthusiasts and grill masters. It not only enhances your outdoor cooking experience but also serves as a focal point for gatherings and cookouts. With that in mind, here's some simple instructions for a great grilling center for your backyard area.
Materials You'll Need:
- Cinder blocks or bricks
- Grill grate or barbecue
- Countertop material (e.g., reclaimed wood, concrete pavers)
- Grout (if using bricks)
- Outdoor paint (optional)
- Shelving (optional)
Steps:
- Choose Location: Select a spot for your barbecue station, ideally close to your patio or dining area.
- Build Base: Stack cinder blocks or bricks to create the base for your barbecue. Ensure it's stable and level.
- Install Grill: Place the grill grate or barbecue on top of the base.
- Add Countertop: Install a countertop material on either side of the grill to provide workspace. You can also add shelves for extra storage.
- Decorate (Optional): Paint the cinder blocks or bricks to match your outdoor aesthetic, or leave them natural for a rustic look.
- Enjoy: Your barbecue station is ready to use for grilling delicious meals and hosting outdoor gatherings.
3. Install a Water Feature
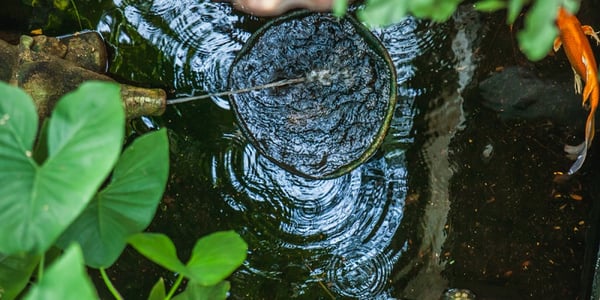
While these are certainly not new or particularly novel, they can be installed and used in new and novel ways. Most backyard water features tend to be set up against a fence or in a corner. This is certainly fine, but consider making a large fountain the centerpiece of your backyard space.
Another idea is to have two, identical fountains spaced on either side of the yard. Stone fountains, waterfalls, or bubbling cisterns can be both visually impacting and provide great ambiance to your backyard retreat. The large the feature and volume of water, the more it can be seen and heard.
If you prefer a more rustic look and feel for your outdoor expanse, your water features can be well complemented with either gas torches or outdoor lights strung around or across the yard area. The great thing about these is that they can be used during the daylight hours as well as at night, and add an almost surreal atmosphere to even the most "common" outdoor space.
Here's an idea to stir your creative impulses:
A simple, DIY water feature can add a soothing ambiance to your backyard, making it a more peaceful and relaxing space. And the good news is that creating a simple water feature like this one is both affordable and DIY-friendly.
Materials You'll Need:
- Container or basin (e.g., a large pot or tub)
- Submersible water pump
- Water tubing
- Decorative stones or pebbles
- Aquatic plants (optional)
Steps:
- Select a Container: Choose a container or basin of your desired size and shape. This will serve as the reservoir for your water feature.
- Place the Pump: Install the submersible water pump in the center of the container.
- Connect Tubing: Attach water tubing to the pump's outlet and place the other end where you want the water to flow.
- Decorate: Fill the container with decorative stones or pebbles to cover the pump and tubing, creating a natural look.
- Add Water: Fill the container with water until it covers the pump.
- Optional Plants: If desired, add aquatic plants like water lilies for a more natural and vibrant touch.
- Turn It On: Plug in the water pump, and your DIY water feature will come to life, creating a calming sound and visual focal point in your backyard.

Take the Next Step
The great thing about improving the look and livability of your backyard is that it doesn't have to be costly. And you don't have to be a DIY genius. Simple touches and inexpensive additions can dress up an otherwise unexciting outdoor space.
And, if you are a bit more ambitious, there are literally hundreds of ways to make your backyard into a refuge or a destination that will impress your friends and family, and make your neighbors envy.
These three DIY backyard improvement projects – adding a new patio, creating a barbecue station, and installing a water feature – are excellent ways to enhance your outdoor space without breaking the bank.
With some creativity, a bit of effort, and a modest budget, you can transform your backyard into a more enjoyable and inviting area for relaxation and entertainment. So, roll up your sleeves, gather your materials, and get ready to enjoy your improved outdoor oasis.

Call in an Expert Team for that Yard Debris
Yard waste and debris from your backyard projects can sometimes be more junk than you can handle. In addition, you may have had some recent storms that left huge tree branches strewn across your yard. Or maybe you're planning a gardening or landscaping project that’s going to leave a lot of dirt and debris everywhere.
And after upgrading your backyard, you have other debris that's not organic like a bunch of junk and clutter in your yard that you haven’t had time to clean up?
Junk King provides an efficient, safe and eco-friendly yard waste removal service so you don’t need to worry about the pick up or disposal of your yard debris. Our experienced debris removal team will break down and haul off any types of yard waste you have. Unlike the backseat of your car, our junk removal trucks are made to handle those dirty yard debris items.
Ready to get rid of your yard waste? It’s as simple as 1, 2, 3.
You make an appointment by booking online above or by calling 1.888.888.JUNK (5865).
Our professional and insured yard waste removal team will show up at your home or office; we call 15 to 30 minutes before we arrive on site and we’ll give you a free estimate based on how much room your junk takes up in our truck. You point and we haul the debris into our junk removal trucks, with no hidden fees.